![]()
Beautiful Plants For Your Interior
Introduction
Needle felting is not just an art form—it’s an immersive experience. It’s the process of transforming humble wool into something magnificent, something that captures the essence of life. When I first started needle felting, I never imagined I would be creating vibrant, life-like feathers from wool, but over time, I’ve mastered the craft, particularly when it comes to bringing birds, especially parrots, to life. The key to creating truly stunning parrot feathers lies in a combination of technique, patience, and the right materials. Let’s dive into the detailed process and discover how you can replicate the elegant feather patterns of a parrot through needle felting.
Creating the perfect feather in needle felting is no small feat. It involves layers, subtle details, and a keen understanding of the texture and finish that feathers naturally exhibit. A parrot’s feathers, in particular, are glossy and vibrant, requiring careful attention to color blending and the type of wool used.
The foundation of any needle felting project is the wool you use. For feathers, especially those as delicate and vibrant as a parrot’s, I prefer to use Corriedale wool. Corriedale is a medium-grade wool that holds its shape well, making it perfect for creating both firm structures and fine details. Unlike Merino wool, which is too fine for detailed felting, Corriedale has enough firmness to hold onto the shape you want without being too stiff.
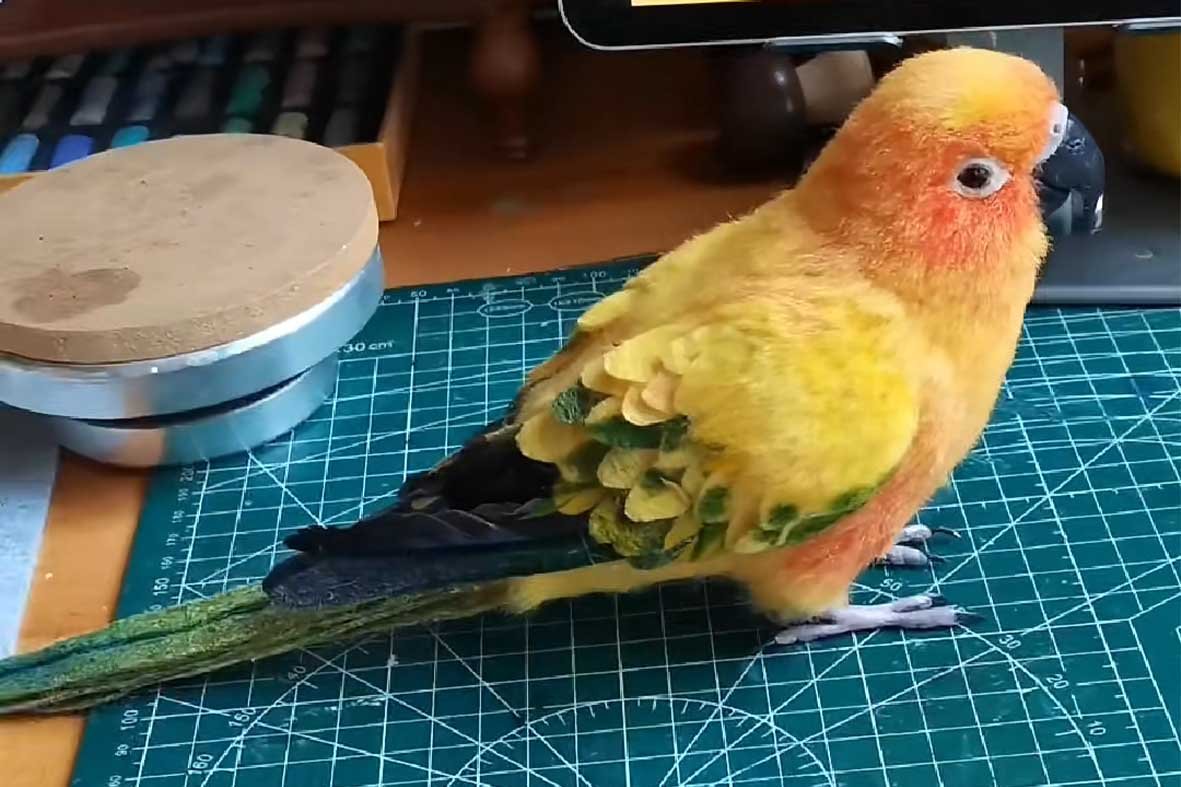
When I start creating a feather, I begin with the most basic layer of wool, carefully shaping it with a 36-gauge triangular needle. This needle allows me to begin forming the rough outline and structure of the feather without getting too specific yet. It’s during this stage that I establish the basic shape and outline of the feather, making sure it’s sturdy enough to hold all subsequent layers. The goal here is to create a solid, dense layer of wool that acts as the base for the more intricate colors and details I’ll add later. For a parrot’s feather, this means getting the shape just right—slightly tapered at the tip, with a broader base. It’s a delicate process of poking and prodding until the wool begins to fuse and form a stable surface.
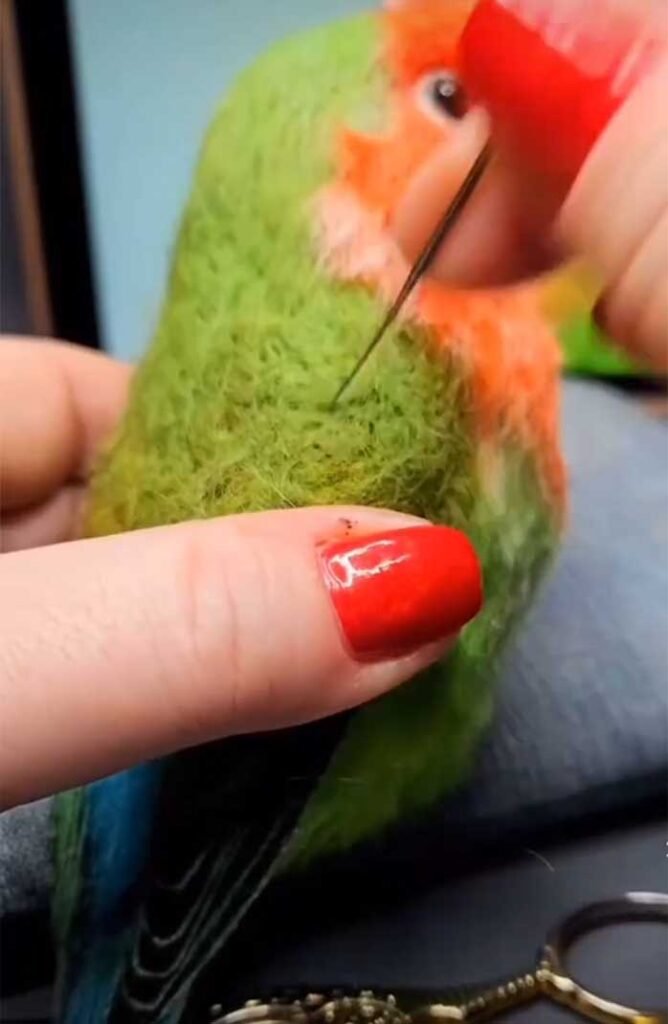
Once I’ve established the base layer, I move on to layering different colors. This step is crucial for capturing the glossy and iridescent look of parrot feathers. Parrots have vibrant, layered feathers, with colors ranging from bright blues to deep greens, yellows, and reds. To replicate this effect, I choose a combination of wool shades that closely resemble the bird’s natural plumage. I use a 42-gauge needle to achieve finer details, carefully blending different colors to create the natural gradient effect. This needle is particularly useful for shaping the fine edges and giving the wool a smooth finish. By gradually adding and blending the wool, I can mimic the multi-tonal nature of parrot feathers.
Creating custom pet portraits is one of the most rewarding aspects of needle felting. It’s not just about creating a likeness; it’s about capturing the essence and personality of a pet, often through tiny, intricate details. Whether it’s the sharpness in a parrot’s eyes or the fluffiness of a dog’s coat, every pet has unique features that can make or break the portrait.
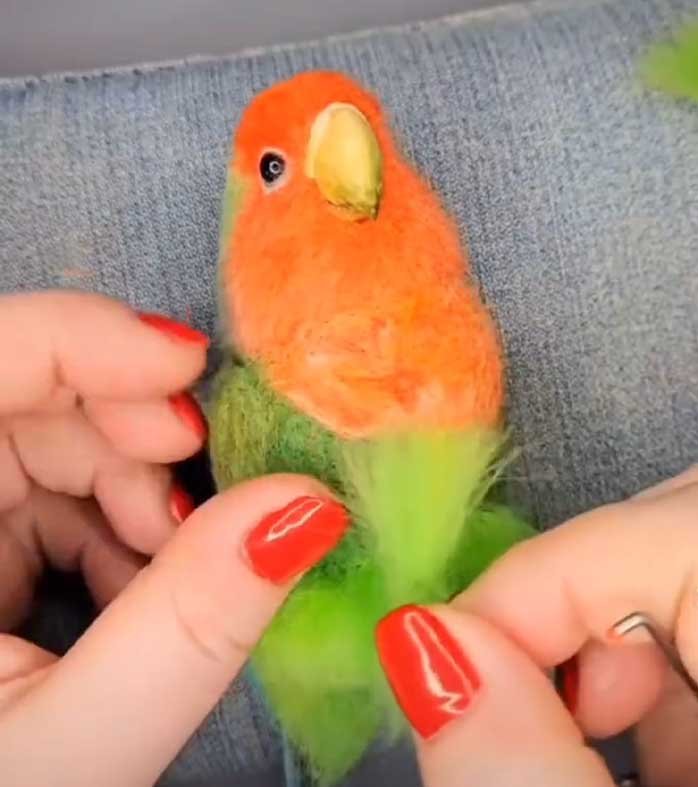
Before I start any custom pet portrait, I take time to understand the pet’s personality. This is crucial because no two pets are the same, and the portrait must reflect their individual traits. For a parrot, for instance, I often find myself focusing on their expressive eyes and vibrant, lively feathers. Parrots are incredibly intelligent and full of energy, so it’s essential to convey that vitality through the artwork. I’ll often ask the pet owner to provide multiple photos of their pet in different poses. For parrots, a clear shot of their face is key, as I need to capture the detail in their eyes, beak, and the subtle curve of their neck.
Once I have the photos and a general understanding of the pet’s essence, I start by shaping the wool into a basic outline. For a parrot, I begin with the head and beak, using my 36-gauge needle to define the shape. The beak of a parrot is often one of the most defining features, so it’s important to get the angle and sharpness just right. From there, I continue shaping the body and feathers, paying close attention to the posture and expression of the bird. The final touches come in when I focus on the eyes and feathers. The eyes are one of the most important features to get right, as they convey so much of the pet’s personality. I carefully sculpt the wool around the eyes, making small adjustments to the shape and adding highlights to make them look lifelike.
Needle felting may seem intimidating at first, but it’s an incredibly accessible craft once you get the hang of it. In this section, I’ll walk you through the basics of getting started with needle felting and share some personal tips that will help make your felting journey a success.
To get started, you’ll need the following:
Wool: For beginners, I recommend using a wool blend that’s easy to work with, like Corriedale or Merino wool.
Needles: A 36-gauge triangular needle is great for general sculpting, while a 42-gauge needle is ideal for finer details.
Foam Pad: A foam pad provides a sturdy surface for felting, preventing the needle from getting damaged and offering resistance as you poke.
Scissors: Sharp scissors are essential for trimming and refining your felting.
Start by pulling a small amount of wool from the roving and using your felting needle to poke it into a foam pad. The wool fibers will interlock with each other as you poke, gradually forming a solid mass. This is the foundation of your creation. The more you poke, the denser the wool will become. As a beginner, I recommend starting with simple shapes, like spheres or rectangles, and practicing until you get comfortable with how the wool responds to the needle.
Once you’ve got the basic shape, it’s time to add finer details. This is where things get really interesting. For a parrot, for example, you can begin adding layers of wool to create the feathers. Use your finer needles, like the 42-gauge or 38-gauge, to add layers of different colored wool, blending the colors as you go. Pay close attention to how the wool forms around the edges and corners. Use the needle to define the shape and refine the details, making adjustments as necessary.
One of the most fulfilling aspects of needle felting is creating personalized gifts for pet lovers. These custom pieces are not just gifts; they’re expressions of love and appreciation for the bond between pets and their owners.
Custom pet portraits, whether they’re made as sculptures or as detailed flat artworks, make perfect gifts for animal lovers. A needle-felted portrait can capture the essence of a beloved pet, creating a lasting memory that’s far more personal than a generic store-bought gift. I always start by asking the pet owner about their pet’s quirks and habits. What makes their pet unique? Is there a particular pose or expression that they love most? For example, some clients have pets that love to sit in specific spots, or they have a special way of sitting that’s unique to them. These are the details I try to incorporate into my work, making each gift truly one-of-a-kind.
Another popular gift is the custom plushie. These soft, cuddly versions of a client’s pet are more than just toys—they’re treasured keepsakes. When crafting a plushie, I use soft Merino wool for its ability to create a gentle, fluffy texture. I also add tiny details like whiskers, paws, or tails, all of which make the plushie come to life in its own special way. Creating these custom plushies involves more than just sewing a few pieces of wool together. Every stitch, every layer of wool is carefully crafted to ensure that the plushie not only looks like the pet but feels like them, too.

Needle felting is a rewarding and deeply personal craft. Whether you’re making detailed parrot feathers or creating custom pet portraits, this art form allows you to breathe life into wool, transforming it into something that’s not only beautiful but meaningful. Through careful layering, attention to detail, and a little bit of patience, anyone can create stunning works of art that capture the essence of their beloved pets.